Blogs

on April 9, 2024


While running Intuit data protect, the user might get the following error message “Intuit data protect backup failed: Firewall or connection issue” or “Intuit Data Protect Backup Failed: One of the configuration files is damaged or corrupted”. If you are also facing any such error, then reading this post ahead would be of great help. This kind of error could be seen due to the cache, cookies, temporary files, and SSL state in the internet explorer. This error could be fixed with a couple of steps and procedures, which we have discussed later in this post.

Thus, make sure to read this post carefully till the end in order to resolve the Intuit Data Protect Backup Failed problem. Or you can also get in touch with QuickBooks error support team. Their experts and certified professionals will ensure to provide you with immediate support services.
Steps to resolve the intuit data protect backup failed (configuration files is damaged or corrupted)
The user can resolve the Intuit data protect backup failed error, by carrying out the below procedures.
Solution 1: Adding trusted sites
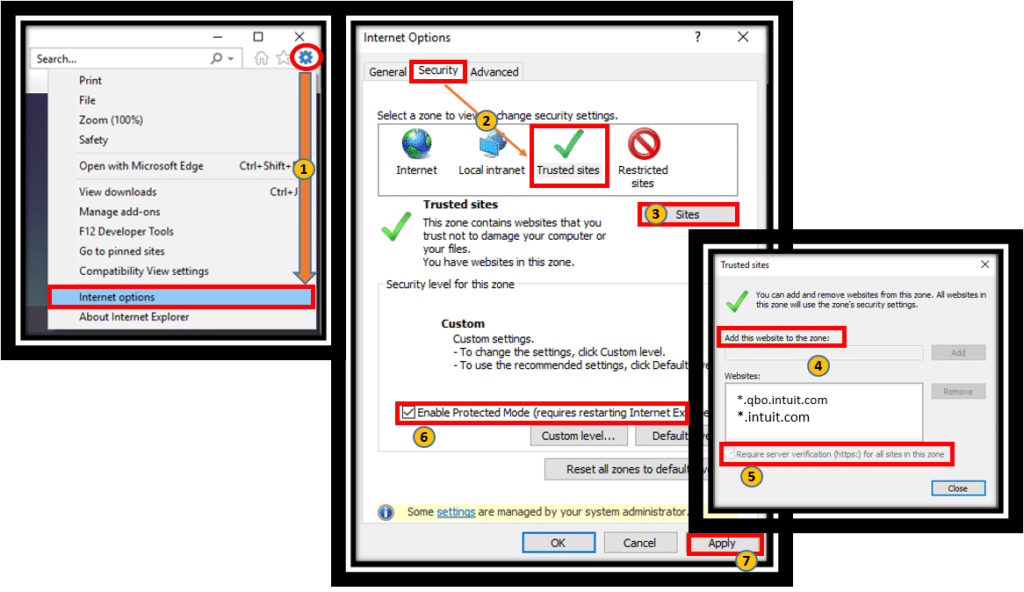
- At first, the user needs to open internet explorer
- And then, move to the tools menu and also select internet options
- Followed by moving to the security tab and then uncheck the enable protected mode checkbox
- Also, select trusted sites and click on sites
- After that, uncheck the require server verification for all sites in this zone checkbox
- And also, add *.backup.com, *.intuit.com and select close
- The next step is to move to the privacy tab and then select sites
- The user will then have to add the websites in the address of the websites ox
- And lastly, close allow each time you add the web addresses
Solution 2: Clearing the internet explorer cache, cookies, temporary files, and SSL state
- The user will have to firstly open internet explorer
- And then move to the tools menu and select internet options
- Then, move to the general tab and select delete
- Followed by, selecting the checkboxes
- And then, selecting delete to clear the items

- Now, move to the content tab
- Lastly, select clear SSL state and hit ok tab
Posted in: Business